by Peter B. MacIntyre, ZCE
DISCLAIMER: We have not tested this code.
Recently I came across RingCentral (one of our sponsors), and their way cool suite of communications products. With RingCentral, companies are able to take their traditional phone system into the cloud (letting them have multiple numbers ring, make calls from their office phone, laptop, or cell phone, and letting them configure their phone system through an online interface).
But beyond the traditional phone system, RingCentral also provides numerous APIs and widgets via the Developer program – letting their customers make phone calls, send text messages, build out team messaging and interactions, schedule meetings, and even send faxes (if that’s still a thing) all online programmatically.
Seeing all of these capabilities made me start to wonder, what could I as a WordPress developer do with them? And how could these features help my customers?Naturally, that meant it was time to build a WordPress plugin. Specifically one that would let users subscribe to be notified via text message when new blogs were posted, but also that would let administrators make phone calls and send SMS messages from within the WordPress admin.
Jumping into the Code
To get started, I created a basic WordPress plugin skeleton. Create a folder under the wp-content/plugins folder structure and call it the same name as your plugin “/ringcentral” in our case. Then have a PHP file named the same as the folder within that folder: “ringcentral.php” in our case. Also, in that folder you should have a file called “uninstall.php” that will be used if the plugin is to be removed at any time. This will have any commands in it that will allow the plugin to remove itself from the WordPress environment and also tidy up after itself in the database if that is required. The overall folder structure should look like this including folders for all the supporting cast of characters (technology) that you may use over time. The “includes” folder is where you would place the majority of your plugin’s PHP code.
Within that “ringcentral.php” PHP file you should have the basic comment header that describes the plugin and any licensing that goes along with it, typically the GPL2 license is used. Here is a generic example that would be in this path wp-content/plugins/my-own-plugin/my-own-plugin.php:
/*
Plugin Name: My Own Plugin
Plugin URI: http://paladin-bs.com/mage/
Description: My Own Plugin Admin System
Author: Peter MacIntyre
Version: 0.25
Author URI: http://paladin-bs.com/peter-macintyre/
Details URI: http://paladin-bs.com
License: GPL2
License URI: https://www.gnu.org/licenses/gpl-2.0.html
My Own Plugin is free software: you can redistribute it and/or modify
it under the terms of the GNU General Public License as published by
the Free Software Foundation, either version 2 of the License, or
any later version.
My Own Plugin is distributed in the hope that it will be useful,
but WITHOUT ANY WARRANTY; without even the implied warranty of
MERCHANTABILITY or FITNESS FOR A PARTICULAR PURPOSE. See the
GNU General Public License for more details.
See License URI for full details.
*/
After this typical heading, you would start your code. Keeping in mind that usually you are creating a plugin with an admin menu component, you would add in a basic menu structure with code like this:
/* ===================== */
/* Make top level menu */
/* ===================== */
function My_Own_Plugin(){
add_menu_page(
‘My_Own_Plugin Admin Management Page’, // Page & tab title
‘My Own Plugin’, // Menu title
‘manage_options’, // Capability option
‘MOP_Admin’, // Menu slug
‘MOP_config_page’, // menu destination function call
‘dashicons-admin-multisite’,
// use a dashicon available in WordPress
// https://developer.wordpress.org/resource/dashicons
// plugin_dir_url(__FILE__) . ‘images/My_Own_Plugin_icon.jpg’,
// or add your own custom menu icon
80 ); // menu position level
add_submenu_page(
‘MOP_Admin’, // parent slug
‘My_Own_Plugin System Configuration Page’, // page title
‘System Config’, // menu title – can be different than parent
‘manage_options’, // options
‘MOP_Admin’ ); // menu slug to match top level (go to the same link)
add_submenu_page(
‘MOP_Admin’, // parent menu slug
‘Do Something Cool Page’, // page title
‘Do Something Cool’, // menu title
‘manage_options’, // capability
‘DSC_upl’, // menu slug
‘DSC_html’ // callable function
);
Then calling the add_action hook to run the My_Own_Plugin menu building function, and sub-menu functions.
add_action(‘admin_menu’, ‘My_Own_Plugin’); // call add action func on menu building function above
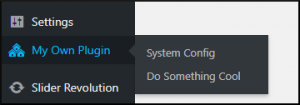
Done right this will create a new plugin entry on the inactive tab of the admin plugin section. Activate the plugin and you should see a new menu item structure that should look like this.

Adding the Virtual Phone
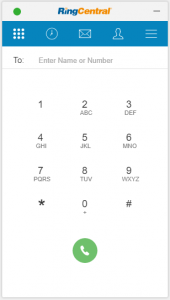
One of the nicer elements of RingCentral Developers is that they offer a copy and paste widget. This meant that I could add the virtual phone to the admin with the following HTML snippet:
<script src= “https://ringcentral.github.io/ringcentral-embeddable-voice/adapter.js”></script>
However, I wanted to go a little bit further, giving the administrator the ability to not only use the API to send SMS messages, but also be able to turn different features of my plugin on or off.
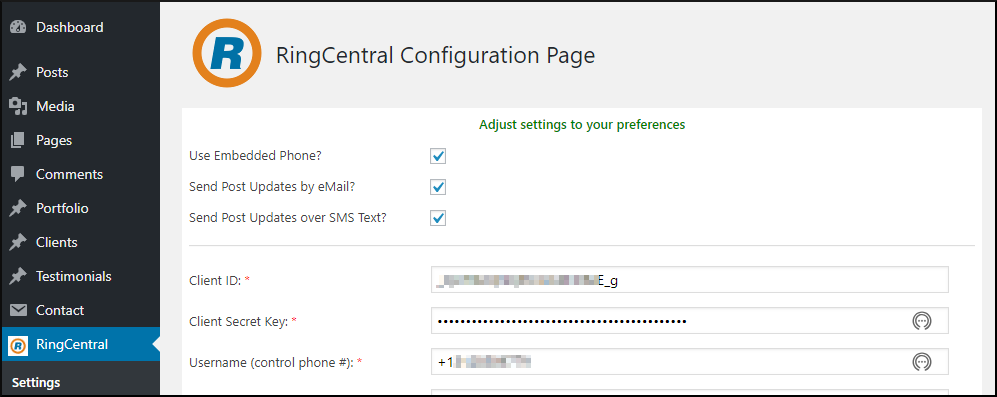
To do this, I built a basic page for the WordPress admin area and jazzed it up with a logo or two. I added a checkbox to turn on or off the embedded phone tool and kept that value in a database table I created.

A quick tangent: be sure to write your SQL code with security and stability in mind. By this I mean that you should be using SQL prepared statements as one means of defense, it will save you a lot of headaches. Also on the stability point, when creating a plugin that will change and improve over time be sure to write your SQL table alterations (in an activation subroutine) with the dbDelta WordPress function; you’ll be glad that you did.
Next I wrote a simple “admin_footer” action in the plugin that would call a function to interrogate the DB value and show or hide the phone app accordingly.
/* ============================================= */
/* Add action for the ringcentral Embedded Phone app toggle */
/* ============================================= */
add_action(‘admin_footer’, ‘ringcentral_embed_phone’);
/* ====================================== */
/* Add custom footer action */
/* This toggles the ringcentral Embedded Phone app */
/* ======================================= */
function ringcentral_embed_phone() {
global $wpdb;
$result_rc = $wpdb->get_row( $wpdb->prepare(“SELECT `embedded_phone`
FROM `ringcentral_control`
WHERE `ringcentral_control_id` = %d”, 1)
);
if ($result_rc->embedded_phone == 1) { ?>
https://ringcentral.github.io/ringcentral-embeddable-voice/adapter.js
<?php }
}
The neat thing about the “admin_footer” action call is that it inserts my defined function call in every page of the admin interface thus allowing the phone app to be accessible anywhere within the WordPress admin area.
And just like that I now had my virtual phone in WordPress!

Adding in SMS Notifications
While the virtual phone let me manually send SMS messages and make phone calls from the admin, I wanted to let my readers (and my customer’s readers) get SMS notifications about new blog posts automatically.
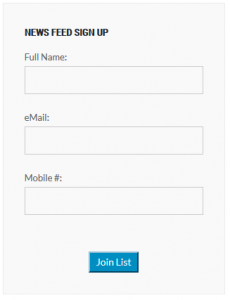
To do this, I built a widget interface asking site visitors if they want to sign up for news feed notifications (blog announcements) when new posts are published on the website.

When a user signed up, they would then be added to the database, and receive an email notification asking them to confirm their email address, an SMS notification asking them to confirm their phone number, or both.
To send an email notification, I simply used the pre-existing wp_mail function, but to send SMS messages I would need to call the RingCentral API.
Adding in the RingCentral API
Thankfully, RingCentral provides a full PHP SDK that lets you take advantage of all their API calls, without having to understand cURL, adding attachments (for MMS or fax), or boundaries (don’t even ask). You can get the RingCentral SDK using Composer by running the following command:
php composer.phar require ringcentral/ringcentral-php
And then including the RingCentral SDK with the vendor autoload file:
require(‘vendor/autoload.php’);
Now calling the RingCentral PHP SDK class is as simple as:
$sdk = ringcentral_sdk() ;
Sending the Text Message
Now was the time for the moment of truth. I built a function using RingCentral’s SDK to send text messages, wrapping it in a try/catch, like so:
try {
$apiResponse = $sdk->platform()->post(‘/account/~/extension/~/sms’,
array(‘from’ => array(‘phoneNumber’ => ‘$config[‘ringcentral_number’]’),
‘to’ => array( array(‘phoneNumber’ => $mobile_contact[‘mobile’]) ),
‘text’ => $message ) );
} catch (\RingCentral\SDK\Http\ApiException $e) {
$apiResponse = $e->apiResponse();
$return_message = “There was an error broadcasting to the mobile list. => ” . $apiResponse;
}
In the case of this function, I would pass in $sdk and $config as globals, and pass the $mobile_contact and $message as parameters, letting me reuse the function for each subscriber within a loop.
And needless to say – it worked! Well sort of… my friends in the US and Canada received the text without any problem. But it turns out, to protect users RingCentral requires you to enable international SMS messages for the API (as domestic text messages are free, but international texts usually cost more due to carrier fees). This means to use RingCentral SMS internationally, you’ll need to enable this on your RingCentral account (and also be very conscious of how many international messages you’re sending).
One solution I came up with was to limit the SMS subscriptions to North American numbers only, while letting everyone receive email notifications. This was as simple as implementing a quick regex to validate the phone number and the country code.
if (!preg_match(‘/1[0-9]{9}/’) {
echo ‘Only US Numbers are supported at this time.’;
}
Next Steps
With RingCentral’s platform, the sky’s the limit – as you have the ability to not only create SMS notifications, but start video meetings and build in real-time, rich messaging that can be accessed from within your app, via the RingCentral App, and on the go.
The same goes for this plugin. While it now supports the virtual phone widget and SMS notifications, I’m excited to see what else we can add to it, and how we can take advantage of real-time communication tools inside of WordPress.
If you happen to be at either WordCamp Seattle, or RingCentral’s ConnectCentral conference in San Francisco I’d love to talk to you more about how I built the plugin, it’s current status, and what the future holds. And, of course, if you’re looking for a WordPress developer – Paladin is open for business!
You can also get more information about this plugin, including when it is officially released at https://paladin-bs.com/contact/ (please use “RC API Plugin” as the subject).
=====================
Peter MacIntyre has over 28 years of experience in IT, primarily in PHP. Author of “Building Exceptional Sites with WordPress & Thesis” and “PHP: The Good Parts“; co-author: Programming PHP-3rd Ed & Pro PHP Programming, among others. Peter has spoken at PHP Central Europe (Warsaw, Poland); PHP[World] 2016 (Washington, DC); ZendCon 2016 (Las Vegas), NortheastPHP (Boston), CA-World (New Orleans); CA-TechniCon (Köln, Germany); and CA-Expo (Melbourne, Australia). Peter is a past co-chair and co-founder for the Northeast PHP Developer’s Conference, and is Zend certified for both PHP 5.3 and 4.0.
